Worn shock absorbers, or "dampers", are among the most common causes of poor handling and one of the most over-looked. Ineffective damping can unbalance the running of your car and may lead to poor cornering, braking or road holding. You may also experience tyre wear, steering vibrations or axle tramp on hard acceleration. Poor dampers can even cause headlight dazzle at night as they allow the car body to wallow up and down. It pays to check the condition of your dampers and their mounts regularly. If your shock absorbers do not pass the checks outlined in the panel they should be replaced. A new set may seem an unnecessary expense, but they will improve your car.
Damper Checks
- Look for loose or worn mounts.
- Check the mounting rubbers for signs of wear or perishing.
- Look for any fluid leaks.
- Make sure the damper piston rod is not bent. Do this by lying under the car while an assistant rocks it up and down. First, make sure that you will have enough room underneath to be clear of any part of the car.
- Check that the damper rod is not scored.
- See that the damper body and shroud are not corroded or damaged.
- On struts, check that the coil spring locating seats are not damaged.
- Bounce each corner of the car in turn. Release it on the downstroke and see that it returns to normal body height within one to one and a half bounces.
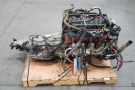
Telescopic Shock Absorbers
The majority of classic cars (post the Vintage era) are fitted with telescopic shock absorbers as these units are more suited to independent
suspension and may be installed at different angles, unlike the lever-arm variety which must be mounted vertically. Except on the
Fiat 124, telescopic dampers cannot be repaired and no attempt should be made to do so. Even for the
Fiat 124, where it is possible to re-build the dampers, the amount of time and labour involved, plus the expense of new parts, do not add up to a substantial saving over the cost of new dampers.
Dampers should be replaced in axle pairs, that is to say both dampers on one axle should be replaced. If they are not, imbalance may be set up due to the older shock absorber having a weaker damping pattern than the new unit. There is no hard and fast rule, but unless you are sure that the second damper has been exposed only to low mileage, it makes sense to renew both. Telescopic shock absorbers are all tubular in shape but vary in size, construction and action. So it is important that the correct type of replacement damper is obtained for your particular model.
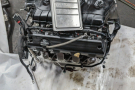
The shock absorber units themselves may be of twin tube or single tube design. They may be fluid or gas filled, single or double-acting. Whatever the type, the method of replacement is basically the same. It differs only in the type of locating mount specified by the manufacturer and the position of the damper relative to the
coil spring. The majority of telescopic dampers, whether mounted independently or within a
coil spring, have a bottom "eye" mount with rubber or nylon bush inserts, attached to the
suspension by means of a through-bolt. This may have a nut with nylon insert or be a castellated nut with a split pin. In a few bottom mounts the eye has a sealed unit pivot with bolts or holes situated at either end of it for location on the
suspension.
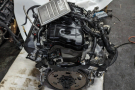
Top mounts will have either a conventional eye and bush arrangement or a threaded stem (or extension of the damper rod) with doughnut bushes and spacers. The latter type are sometimes located in a plate or spring carrier, which in turn locates on the bodywork. The mount design which differs most from the general pattern is the strut on the MacPherson unit. This is a one-piece, suspension-leg, coil-spring and damper unit from which the damper can be extracted only after dismantling the strut. This is because the damper is usually designed as an insert in the suspension leg and is also used to retain the coil spring.
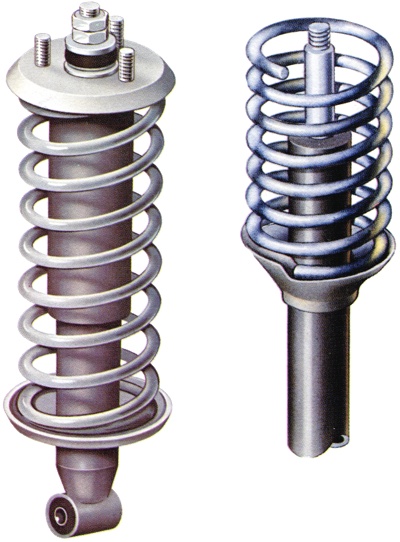
Shown above left is a combined telescopic damper and coil spring unit. At right is a MacPherson strut with positioning spring.

Some cars, such as the Rover 2000, use two cone-shaped bushes in eye-mounted dampers instead of a single push-fitted bush. |
Separately-Mounted Dampers
On some cars the dampers are mounted separately and are not part of the coil spring unit. Transverse leaf springs and torsion bars always use separate dampers. If the damper has a top stem mount, its securing nut and lock nut should be taken off, working through the wing access hole inside the engine compartment, while the weight of the car is still on the damper. The reason for this is that the body weight will help to prevent the damper rod turning as you release the stem nut. Some types feature stem "flats" so that a second spanner can be employed to hold the rod firmly while unlocking the nut. If the weight of the car is not sufficient to prevent the damper from twisting and there are no stem flats, get an assistant to hold the damper shroud from below.
Jack up the front of the car so that the suspension drops, and support the car securely on axle stands. Remove the road wheels and jack up the suspension on the relevant side of the car so that the bottom suspension arm, or wishbone, is horizontal. This will take some of the load off the coil spring. Disconnect the
battery. With stem mounts, remove the lock nut, securing nut and any washers and rubbers. It is best to make a sketch of the order in which you remove any parts. Check also for any distance pieces or spacers and the direction in which any bolts should be fitted. With eye mounts, the nut should be removed while you lock the bolt with a second spanner. The through-bolts often become stiff with use and are best started with a hammer and a drift. Use this at the nut end, taking care not to damage the thread as you may wish to use the bolt again.
Detach the securing bolt from the lower eye mount and remove the damper. If the damper is of the fixed pivot type, undo the nuts then free the damper from its locating points and remove it. Some cars, for example the Rover 2000, use two, cone-shaped, rubber bushes in eye-mounted dampers instead of a single push-fitted bush. Depending upon the
suspension/damper design it may be necessary to alter the height of the suspension support jack to take any load off the mount nuts/bolts. This is particularly applicable to suspensions incorporating double-acting and gas-pressurized shock absorbers.
Before installing a new shock absorber, it is important to check the
suspension locating points of the unit for damage or wear. Any defects that are apparent should be remedied by repair or replacement. Except in the case of gas-pressurized units, the shock absorber itself should be hand-pumped a few times to prime the valves and its bushes should be checked. Most eye bushes are bonded to the inner metal sleeve or pivot by the manufacturer. Threaded stems with doughnut bushes and washers should have the lower rubber and washer slipped over the stem before installation. Do not use old bushes or washers when fitting a new damper. This will result in poor location of the unit and may cause premature failure or defective action. Securing bolts should be tightened with the weight of the car taken by the suspension. If you tighten them with the car jacked up, undue torsional loading may lead to early failure of the rubber bushes.
To fit new dampers simply reverse the procedure for removing the old units. You may experience slight difficulty in locating the unit in its mounts. Where a unit has top and bottom eye mounts, it is a matter of locating one end loosely in its bracket with the through-bolt, then raising or lowering the suspension, or expanding or compressing the damper until the second mount is in position and will accept the through-bolt. It is a good idea to wire brush the through-bolt and coat it with grease to help ease it home. Where the unit has a top stem-mount, it may be easier to locate this first rather than securing the bottom eye mount and then trying to guide the stem into its hole by manipulation of the suspension or the damper itself.
When you have re-fitted the damper and the washers, spacers and nuts, along with the relevant bushes, partially tighten the securing nuts. Fit the wheels and lower the car to the ground. It may be helpful to run the car on to ramps at this stage in order to work from underneath. Tighten the securing nuts to the correct torque. You will have to consult your handbook or dealer to establish the torque figure as it varies from car to car. Before driving the car, bounce the new dampers up and down to check their action.
Dampers Within Coil Springs
Dampers mounted within a coil spring are quite common and removal depends on the type of spring fitting used. You will need a set of strong spring compressors. These should be the type with robust sliding claws on a coarse threaded shaft with nut adjustment. When using these compressors you must exercise great caution; if the coil spring is decompressed suddenly, serious injury may result. Attach the compressors so that they act on as many of the spring coils as possible, then tighten each compressor (you should use two or even three) by equal amounts and in an even manner until the spring is sufficiently compressed. Never tighten one compressor fully and then move on to the next. This can be extremely dangerous.
The simplest form of coil spring mounted damper is on cars such as the
Fiat 124 and the
Ford Cortina Mk IV, where the dampers may be removed through the lower suspension arm without disturbing the coil. On a few types they are removed through the body instead. With this format, the top stem-nut should be slackened (where applicable) before raising the car on body jacks and removing the front wheels. Disconnect the battery. Place a jack under the suspension arm to be worked on, then raise it to compress the spring partially. Detach the top eye-bolt/stem-nut, then remove the lower eye-bolt/pivot securing nuts from the lower mount. The damper can then be extracted from the coil through the lower arm aperture, although a few models have a bottom cover plate which must also be removed.
Where a coil spring is located at one end of an internal damper a different method of removal must be used. The
Hillman Imp front
suspension is an example of this. Here, disconnect the
battery, raise the front of the car on axle stands and remove the road wheels. Support the lower
suspension arm firmly with a jack, then remove the top stem securing nuts which hold the damper rod to the centre of the upper spring-seat locating plate on the body. Slowly and carefully lower the suspension arm on the jack until the coil spring is fully extended. The eye-bolt which holds the damper end to the suspension arm can then be extracted and the damper/coil spring removed.
If the lower
suspension arm will not pivot downwards sufficiently for the coil spring to extend fully and lose its compression, spring compressors will have to be fitted. If you discover this when the suspension arm is at its lowest possible point of travel, jack it back up a short way to compress the coil. Fit a spring compressor to each side, then tighten them evenly to hold the spring in a compressed state. Being extremely careful not to disturb the compressors, lower the suspension arm. As the spring is partially compressed, it should now be possible to remove damper and coil from the car.
The coil spring may then be lifted off the damper along with its upper and lower seat and the stem's lower bush or washer. Special attention should be paid to removable lower spring-seats to see that they are secure when fitted to the new damper. For instance, the lower spring-seat on Imp units is located on the damper by means of split collets and you should check that they are in good condition and that they secure the seat correctly before attempting to rebuild the unit. Before fitting a new damper, the checks noted in the panel should be carried out to all the relevant body and
suspension locating points.
Installing the new unit is the reverse procedure to removal except that the damper/coil spring unit should be attached to the lower suspension arm with the damper fully extended and the spring checked to see that it is correctly seated. This is to help locate the top stem as the suspension is lifted on the jack and the spring becomes compressed. Do not be tempted to insert your fingers through the coils in an effort to align the stem with its mount hole. It is much safer to use a screwdriver blade instead. Tighten all nuts to the torque specified for the relevant model. Some manufacturers, for example Ford, specify that the upper eye bolt on their unit is fitted with its head facing towards the front of the car.
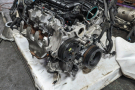
MacPherson Strut Units
Many cars are fitted with MacPherson strut units on the front suspension. The technique used for their removal is similar for all models. First, decide which parts to disconnect from the strut itself. On the Fiat 127, the strut can be easily removed from the stub axle and the top mount, but some struts also carry the stub axle, so you may have to disconnect the brakes, the
anti-roll bar, or some steering parts, or a combination of all three. Jack up the car, remove the relevant road wheel, then support the car on axle stands, after disconnecting the battery. Make clear in your mind which bolts (there are usually three) secure the strut to the lower suspension arm. If you only want to change the damper insert, or if the strut is not combined with the hub, there is no need to remove the hub. If the hub and the strut are combined, proceed as follows:
Remove any
steering connections or
anti-roll bar if they are likely to hamper removal of the strut. If your car has disc brakes remove the caliper and the disc and hub assembly. Make sure you support the caliper with a length of wire in order to avoid straining and damaging the flexible hose. Where possible try to avoid disconnecting the brake pipes, as this will save having to bleed them afterwards. It is a good idea to use a hose clamp. If your car has drum brakes, remove the drum. While not essential, you could also remove the brake shoes. The hub is then removed in the same manner as a disc brake hub. Before you remove the brake backing plate, you may have to undo the flexible brake pipes, but in some cases this is not necessary providing you have sufficient pipe length to be able to lift the backing plate clear of the stub axle without straining the hose. Hold the backing plate to one side with wire.
On some cars, for example the Ford Anglia, the wheel bearings are held in the brake drum, so it is simply a case of removing the drum and then the backing plate. Slacken the lower strut retaining bolts, then undo the upper retaining bolts. When these are free, remove the lower bolts and lift the strut clear. Do not undo the central piston rod nut, as this will free the coil spring and may cause damage or injury when you remove the strut. When you have removed the strut from the car, you are faced with a choice. You can either buy a new or reconditioned strut unit, which comes minus the coil spring, or fit a new damper insert. New or reconditioned units can be bought on an exchange basis, cost very little more than a new damper insert and involve far less work.
Whichever course you decide to take, you will have to remove the coil spring. Carefully attach two or three coil spring compressors to the spring. You may find it helpful to hold the unit in a vice while carrying out this work. Before you begin to tighten the clamps, loosen the central piston rod retaining nut. This is usually staked in position and it is easier to slacken it while the top mount is still under pressure from the un-compressed coil. If the piston rod turns while you attempt to slacken the nut, insert a pair of grips between the coils, protecting the rod from the teeth with a cloth. Make sure the spring compressors are evenly spaced and tighten them carefully, paying heed to the earlier warning. When all the load is taken off the top mount, undo the piston rod nut completely. Never stand directly in the "line of fire" of the spring, just in case it does suddenly and unexpectedly decompress.
With the retaining nut removed, withdraw any insulators and the upper spring seat which contains the upper bearings making a sketch of the order to help you on re-assembling. The coil spring complete with compressors may now be removed. Pull the rubber bump stop from the piston rod. Provided the stub axle and any other components have been removed, the strut can now be exchanged for a new or reconditioned unit. The suppliers will check that any screw threads are in good condition and that the damper rod is not bent. If the threads are stripped or the rod bent the old unit will not be accepted.
Renewing The Damper Insert
If you are renewing the damper insert, proceed as follows. Remove the upper gland nut. This has either a slotted face or two or three locating holes which require a special spanner. If you cannot acquire the special spanner, it is possible to begin loosening the nut with a hammer and chisel. First you may have to knock back the outer lip of the strut where it has been peened over to prevent the nut working loose. This can easily be done by tapping the lip with a hammer and screwdriver or cold chisel. Place the chisel sideways on to the slot or the edges of the gland nut and give short sharp knocks to loosen it. Liberally coat the threads with penetrating oil. Remove the upper gland nut being careful not to damage the threads of the casing.
When you have removed the upper gland nut, the bump stop and any sealing washer (having made a sketch), pull out the damper insert along with its gland and "0"-ring seal. When fitting the new insert lubricate the strut tube with about 150 ml of engine oil. Make sure that the gland and seal are properly seated and that the bump stop is firmly fixed. Re-fit and tighten fully the upper gland nut. Lip over part of the strut casing to prevent the nut working loose.
Re-Assembling The Strut
To re-assemble the strut, prime the damper in the manner described, then re-fit the coil spring. Extend the piston rod fully so that it will locate in the top mount straight away. Fit the retainer, having packed the bearing with multipurpose grease and replace any washers. Do not fully tighten the piston rod retaining nut at this stage. This is done later when the strut has been re-fitted. Make sure the coil spring is correctly located in its seat, then evenly slacken the compressors and release spring tension. Re-lit the complete strut, following the reverse of removal procedure. If the hub was removed, it will require adjustment. Tighten the strut retaining nuts, then place the car back on its wheels. Tighten the piston rod securing nut to the specified torque. Finally, stake the nut into position with a punch and replace the dust cap if one is fitted.